PDF works in both directions, and the two are not mirror images. A PDF comes in as pictures. A presentation goes out with its text still text.
Bringing a PDF in
Section titled “Bringing a PDF in”There are three ways in. All three open the same window, where you choose the pages.
| Where you start | Where the pages land |
|---|---|
| New Presentation → From PDF… | In a new presentation |
| Add File (+) on a presentation’s title bar, then pick the PDF | At the end of that presentation |
| Drag the PDF from the Finder / File Explorer onto the slide list | Where you drop it. Drop it on a card and the pages go after that card — nothing is replaced |
For a new presentation, choose New Presentation from the + beside Library or Cue Sheets in the sidebar. Pick Which library (you have to) and Add to cue sheet (optional) if you want it there too, then press From PDF… instead of Create and pick the PDF. If you leave the name as New Presentation, the presentation takes the PDF’s file name. More on libraries and cue sheets in Libraries and cue sheets.
One PDF at a time. Drop or pick several and only the first comes in, with PDF files are imported one at a time.
Choosing the pages
Section titled “Choosing the pages”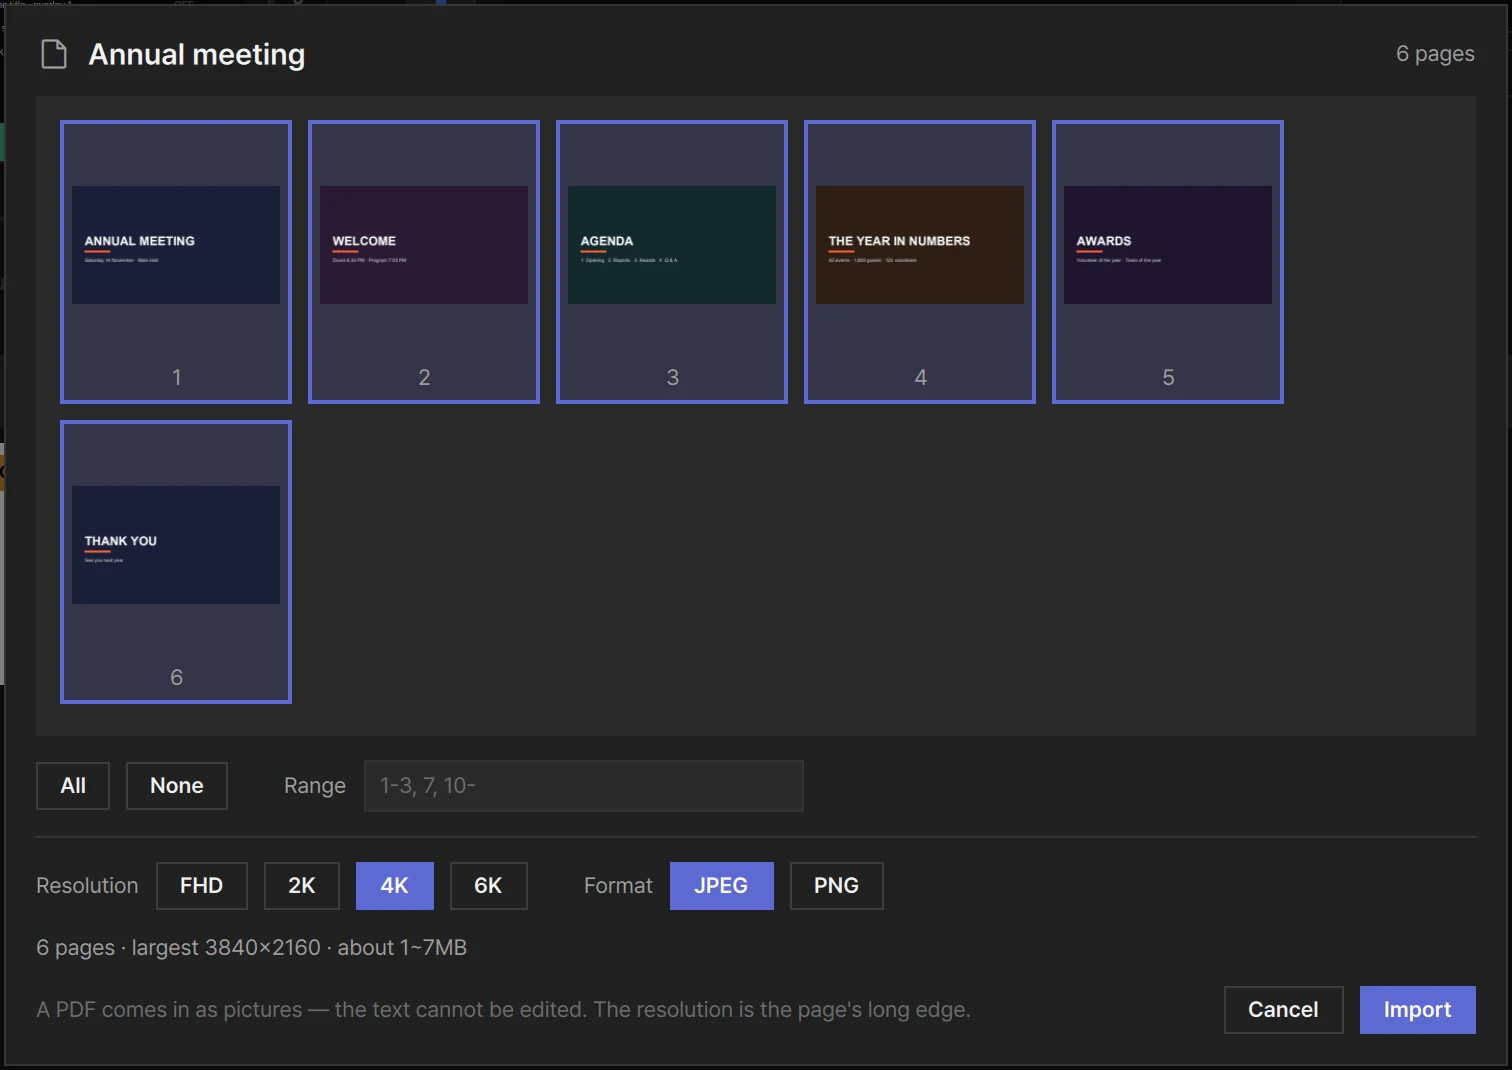
The window’s title is the PDF’s file name, with how many pages it has beside it. If the PDF mixes page shapes, it also tells you how many are portrait and how many landscape.
Every page starts out picked. Click a thumbnail to drop it or pick it again.
| All / None | Picks every page, or none |
| Range | Type pages to pick, such as 1-3, 7, 10- — pages 1 to 3, page 7, and 10 to the end. What you type replaces the current picks |
With nothing picked, Pick the pages to import appears and Import stays greyed out.
Resolution and format
Section titled “Resolution and format”Resolution sets the size of each picture. It is measured on the page’s long edge, whichever way the page faces.
| Resolution | Long edge |
|---|---|
| FHD | 1920 px |
| 2K | 2560 px |
| 4K (the default) | 3840 px |
| 6K | 5120 px |
A 16:9 page at 4K comes out 3840 × 2160 — exactly a 4K screen. A portrait A4 page at 4K comes out about 2715 × 3840. Fitted to a 16:9 screen it only fills the height, so it carries more pixels than the screen shows — room to spare if you crop in on part of it.
Format is JPEG (the default) or PNG. JPEG keeps the files much smaller.
The line under these buttons adds it up for you: how many pages, the size of the largest picture, and a rough file size. The size is given as a range, because it depends on what is on the page — a page of plain text is far smaller than a page full of photos.
Press Import. The button turns to Rendering… and a bar counts the pages. Cancel stops it, and nothing is added. When it finishes, Imported N pages from the PDF appears.
What you get
Section titled “What you get”- Each page is one picture slide. The text on it cannot be edited — the window says so at the bottom. It is a picture like any other, so whatever Slide settings does with a picture, it does with these.
- The page looks the way the PDF draws it. It is drawn with the fonts the PDF carries, so it does not matter whether this computer has them. (A PDF saved without its fonts is the exception.)
- The words on each page are kept for searching. They do not show on the slides, but
Find (
⌘F/Ctrl+F) finds the presentation by a line inside the PDF. A scanned PDF has no words in it, so there is nothing to find. - The pictures go into the media folder, named after the PDF and the page number —
Bulletin 3.jpg. Import the same pages again with the same settings and the same files are used, not new copies. Where that folder is: Where your files live. - One
⌘Z/Ctrl+Ztakes the whole import back. It says Undone — PDF import.
When it does not come in
Section titled “When it does not come in”| What appears | What to do |
|---|---|
| Could not import the PDF — This PDF is password-protected — remove the password and try again | Remove the password in the app that made the PDF, save it, and import it again |
| Could not import the PDF — Could not read the PDF | The file is not one LayerCue can read. Save it again as a PDF from the app that made it |
Saving a presentation as a PDF
Section titled “Saving a presentation as a PDF”- In the sidebar, right-click a presentation — in a library or inside a cue sheet — and choose Export to PDF….
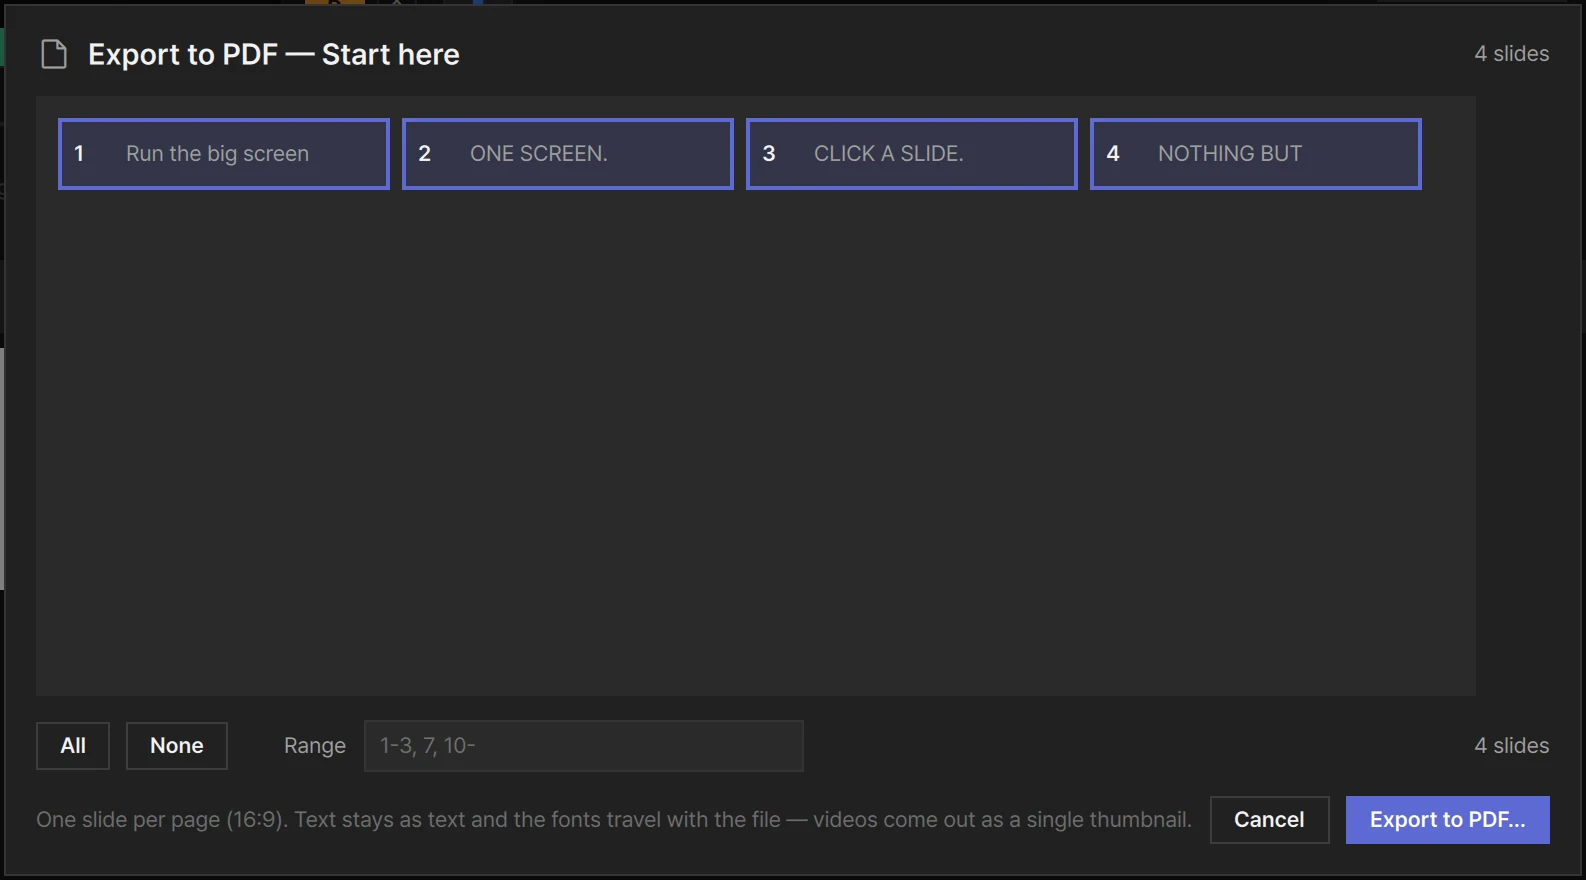
- The Export to PDF window lists its slides by number and name. Every slide starts out picked. Click a slide to drop it or pick it again; All, None and Range work as they do when importing.
- Press Export to PDF… and choose where to save it. The file name starts as the presentation’s name.
- Exported to PDF — followed by where the file went appears when it is done.
It exports one presentation at a time.
What goes into the PDF
Section titled “What goes into the PDF”One slide per page, on a 16:9 page. There are no handout layouts, page numbers or margins — each page is the slide, edge to edge.
| Slide | On the page |
|---|---|
| Text slide | The text stays text — you can select, copy and search it in a PDF reader. The fonts go into the file, so it looks right on a computer that does not have them |
| Picture slide | The whole picture file on a black page, laid out by its Scale as on stage — Fill and Stretch are kept, anything else is fitted. Crop is not applied |
| Video slide | One still — the video’s thumbnail. When the video sits in a box among text and shapes, the page shows them all, with the still in the video’s place |
| A full-screen picture or video with text boxes on top — lyrics over a background picture, a PowerPoint slide with a picture background | As on stage: the picture underneath — for a video or a downloaded YouTube, its thumbnail — and the text boxes over it, their text still text |
| Streaming YouTube or audio slide | No picture comes out. Leave these unpicked |
In the list, every slide that is not a text slide is tagged thumbnail.
When it does not save
Section titled “When it does not save”| What appears | What to do |
|---|---|
| Could not export to PDF — Could not write the PDF — check that you can save to that place | Save it somewhere else, such as your Documents folder |
| Could not export to PDF — Took too long (60 seconds) | Export fewer slides at a time with Range |